專注Java教育14年
全國咨詢/投訴熱線:400-8080-105
更新時(shí)間:2021-09-30 10:51:49 來源:動力節(jié)點(diǎn) 瀏覽1195次
示例采用express項(xiàng)目
npm i apidoc -g
需要先安裝node.js
在項(xiàng)目的根目錄下新建一個apidoc.json,進(jìn)行如下配置
{
  "name": "ScheduleAPIs",
  "version": "1.0.0",
  "description": "日程接口文檔",
  "title": "ScheduleAPIs",
  "url" : "http://localhost:3000/"
}
name:接口文檔名稱
version: 接口文檔版本
description: 接口文檔描述
title: 文檔打開時(shí)瀏覽器顯示標(biāo)題
url: 接口缺省訪問地址
使用樣例如下:
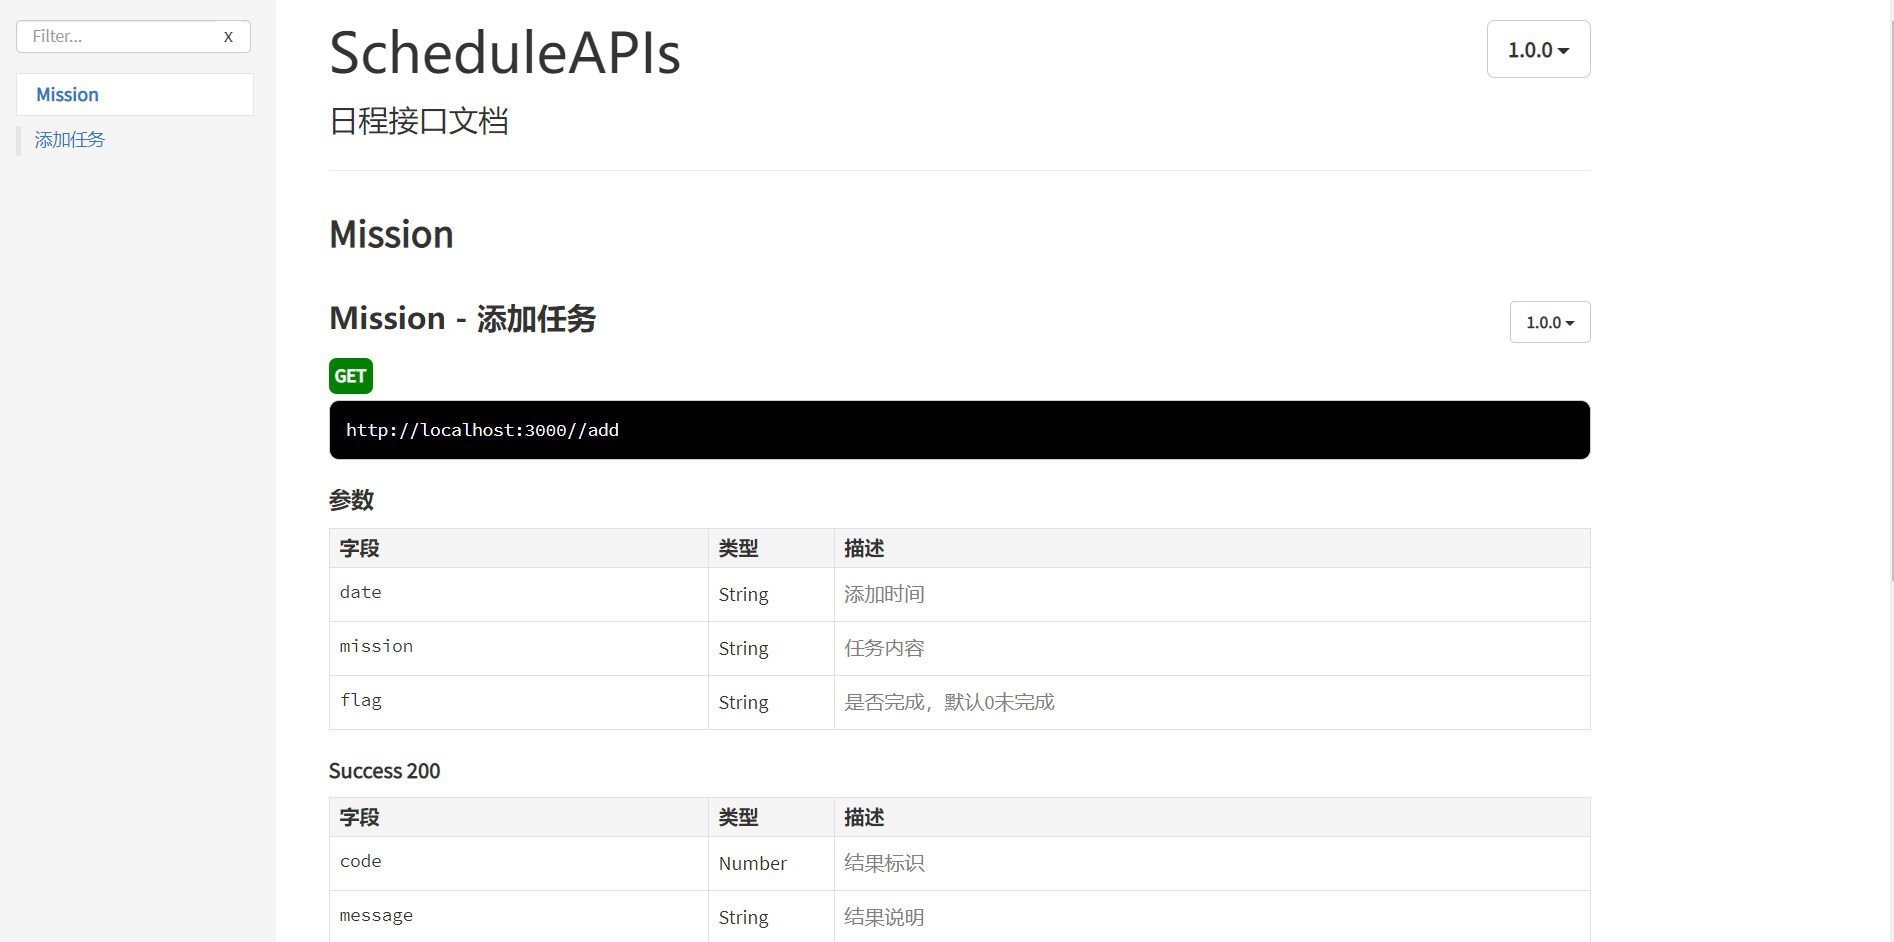
/**
 * @api {get} /mission/add 添加任務(wù)
 * @apiVersion 1.0.0
 * @apiName addMission
 * @apiGroup Mission
 * @apiParam {String} date 添加時(shí)間
 * @apiParam {String} mission 任務(wù)內(nèi)容
 * @apiParam {String} flag 是否完成,默認(rèn)0未完成
 * @apiSuccess {Number} code 結(jié)果標(biāo)識
 * @apiSuccess {String} message 結(jié)果說明
 * @apiSuccess {Object} data 結(jié)果數(shù)據(jù)
 * @apiSuccessExample Success-Response:
 *     {
        code: 10001,
        message: "添加任務(wù)成功",
        data: {
            missionid: "missionid_d4f555c0-aa38-11ea-b716-c335f1f3465d",
            date: "‘2020.6.8’",
            mission: "背單詞",
            flag: "0"
          }
        }
 */
@api
@api {method} path [title]
@api {get} /mission/add 添加任務(wù)
HTTP接口調(diào)用方法、路徑及名稱
@apiVersion
@apiVersion version
@apiVersion 1.0.0
api版本
@apiName
@apiName name
@apiName addMission
api 名稱
@apiGroup
@apiGroup name
@apiGroup Mission
api 分組
@apiParam
@apiParam [(group)] [{type}] [field=defaultValue] [description]
@apiParam {String} date 添加時(shí)間
請求參數(shù)
@apiSuccess
@apiSuccess [(group)] [{type}] field [description]
@apiSuccess {Number} code 結(jié)果標(biāo)識
返回?cái)?shù)據(jù)描述
@apiError
@apiError [(group)] [{type}] field [description]
接口失敗描述
@apiSuccessExample
@apiSuccessExample [{type}] [title] example
@apiSuccessExample Success-Response:{}
接口成功返回樣例
在根目錄下執(zhí)行命令
apidoc -i routes/ -o apidoc/
讀取router文件夾下的注釋,輸出到apidoc文件夾下
點(diǎn)開apidoc文件夾中index.html會發(fā)現(xiàn)已經(jīng)生成的漂亮的api文檔
通過上述介紹,相信大家對API接口文檔生成工具已經(jīng)有所了解,Java的知識點(diǎn)有很多,大家要不斷的學(xué)習(xí),才能掌握前沿的Java技術(shù)。


初級 202925

初級 203221

初級 202629

初級 203743

官方微信

官方抖音


 Java實(shí)驗(yàn)班
 Java就業(yè)班
 Java夜校直播班
 Java在職加薪班
 Java架構(gòu)師班
 京公網(wǎng)安備 11030102010736號